How to list your business on Edwadzi
Create a vendor account, say where you work and what you do, add a price and your logo, and appear in search.
For vendors · 10 minutes · Updated
Before you start
- An email address and a password you will remember.
- Your logo, or a clear photo of your work or of you at work. JPG, PNG or WEBP. Big photos are fine; the app shrinks them for you.
- A few lines about what you do. You need at least 100 characters, about two sentences.
Steps
Open the vendor sign-up
Go to edwadzi.com/register/vendor, or tap “Join as a vendor” on the home page. Under “Account type”, check that “Vendor business” is picked.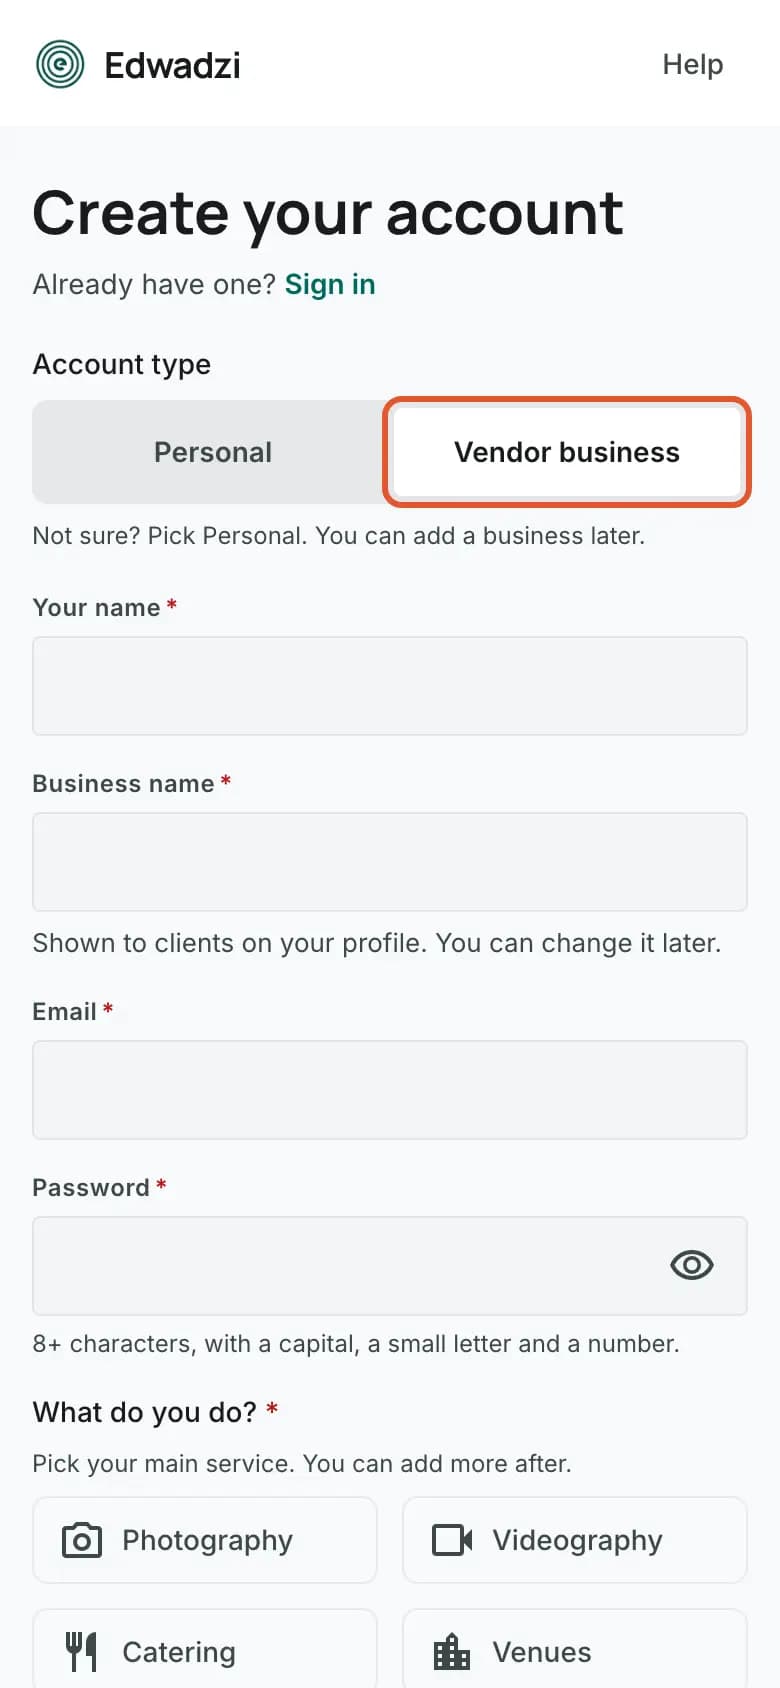
Fill in your details and what you do
Type your name, your business name, your email and a password. The password needs 8 or more characters, with a capital letter, a small letter and a number. Under “What do you do?”, tap your main service. You can add more services later.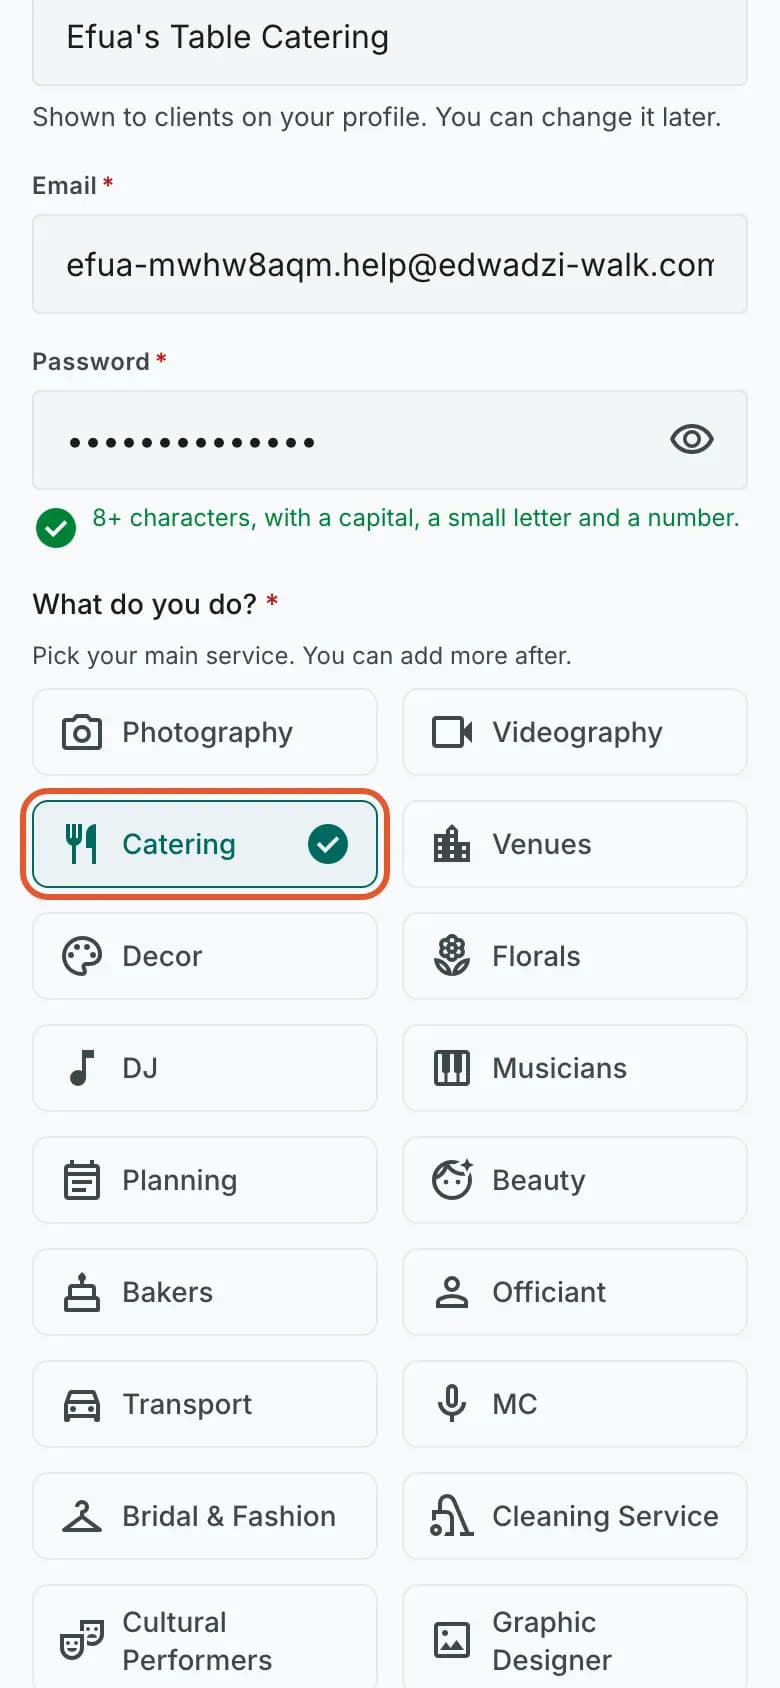
Accept and create your account
Tick “I accept the Terms and Conditions and the Privacy Policy”, then tap “Create account”. The app opens “Set up your listing”, a short setup in 5 steps.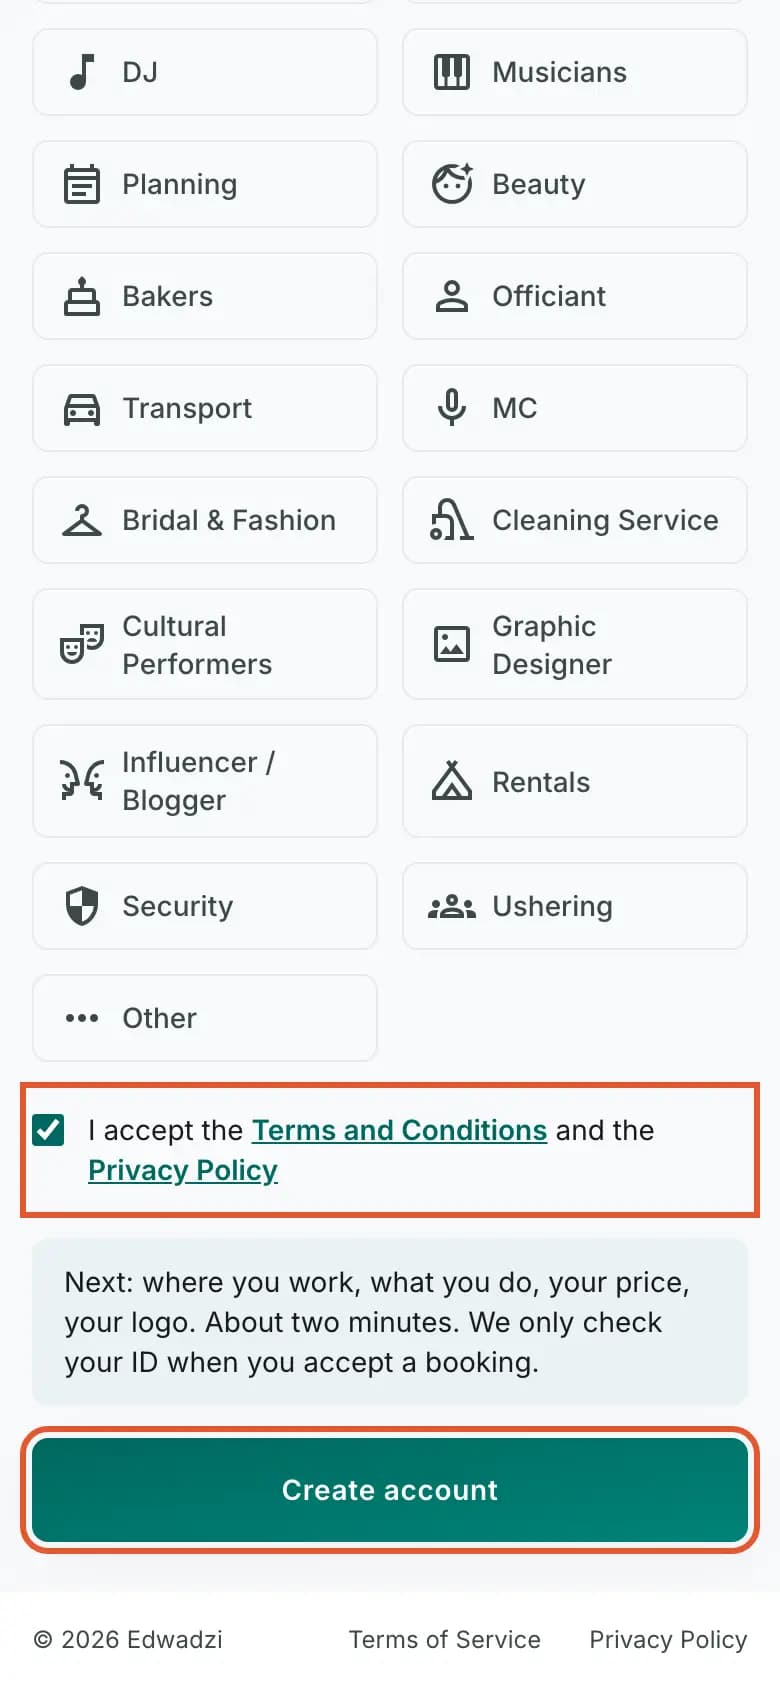
Say where you work
On “Where you work”, type your “City”. It is required: clients search by city first. “Region” and “Business phone” are optional. “Business email” starts as your account email; change it if booking requests should go somewhere else. Tap “Save & Continue”.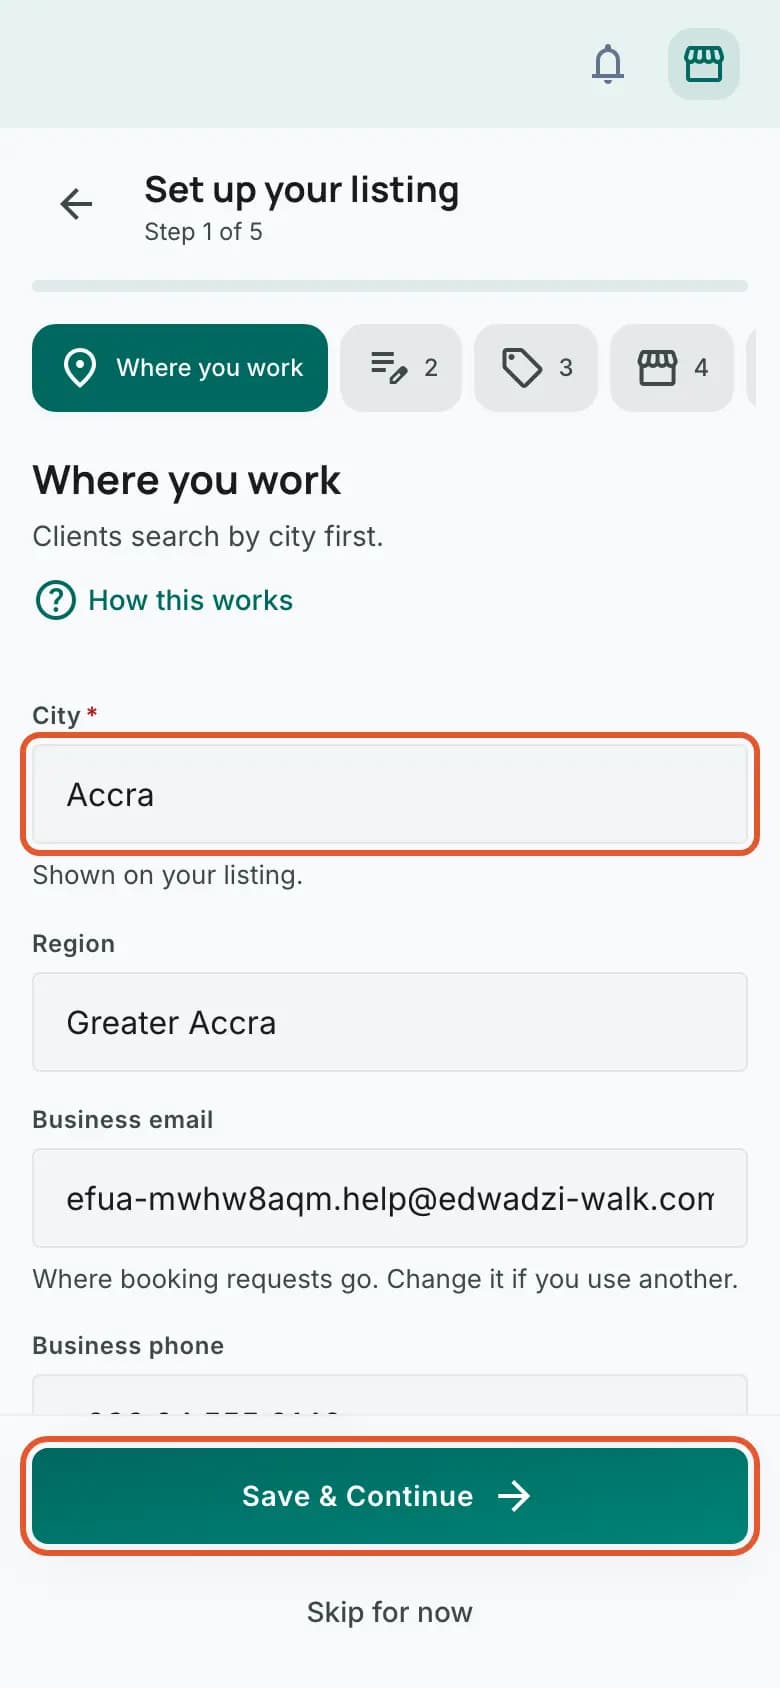
Describe what you do
On “What you do”, write in “Describe what you do” what you offer, for which events and where. Write at least 100 characters; the counter under the box shows how many you have. Your main service is already ticked under “Services”. Tap “Add more” if you offer others. Then tap “Save & Continue”.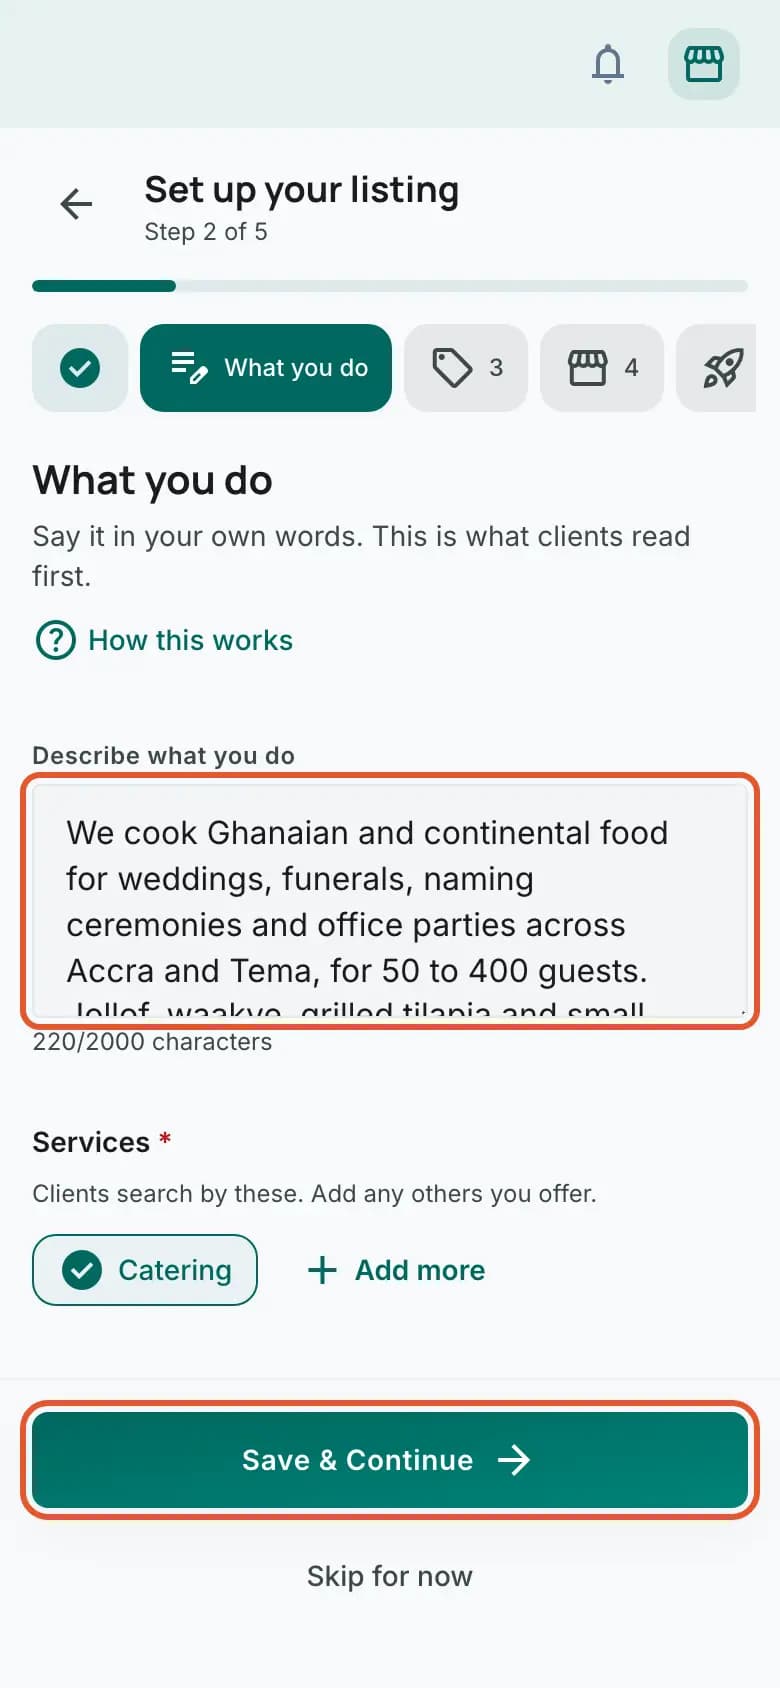
Add your starting price
On “Your price”, type your starting price in “From” and pick how you charge: “per event”, “per hour”, “per guest” or “per day”. “Call it” is the name clients see on your page. Tap “Save & Continue”. If every job is priced differently, tap “I price each job differently” instead; your page then says Quote on request until you add a price.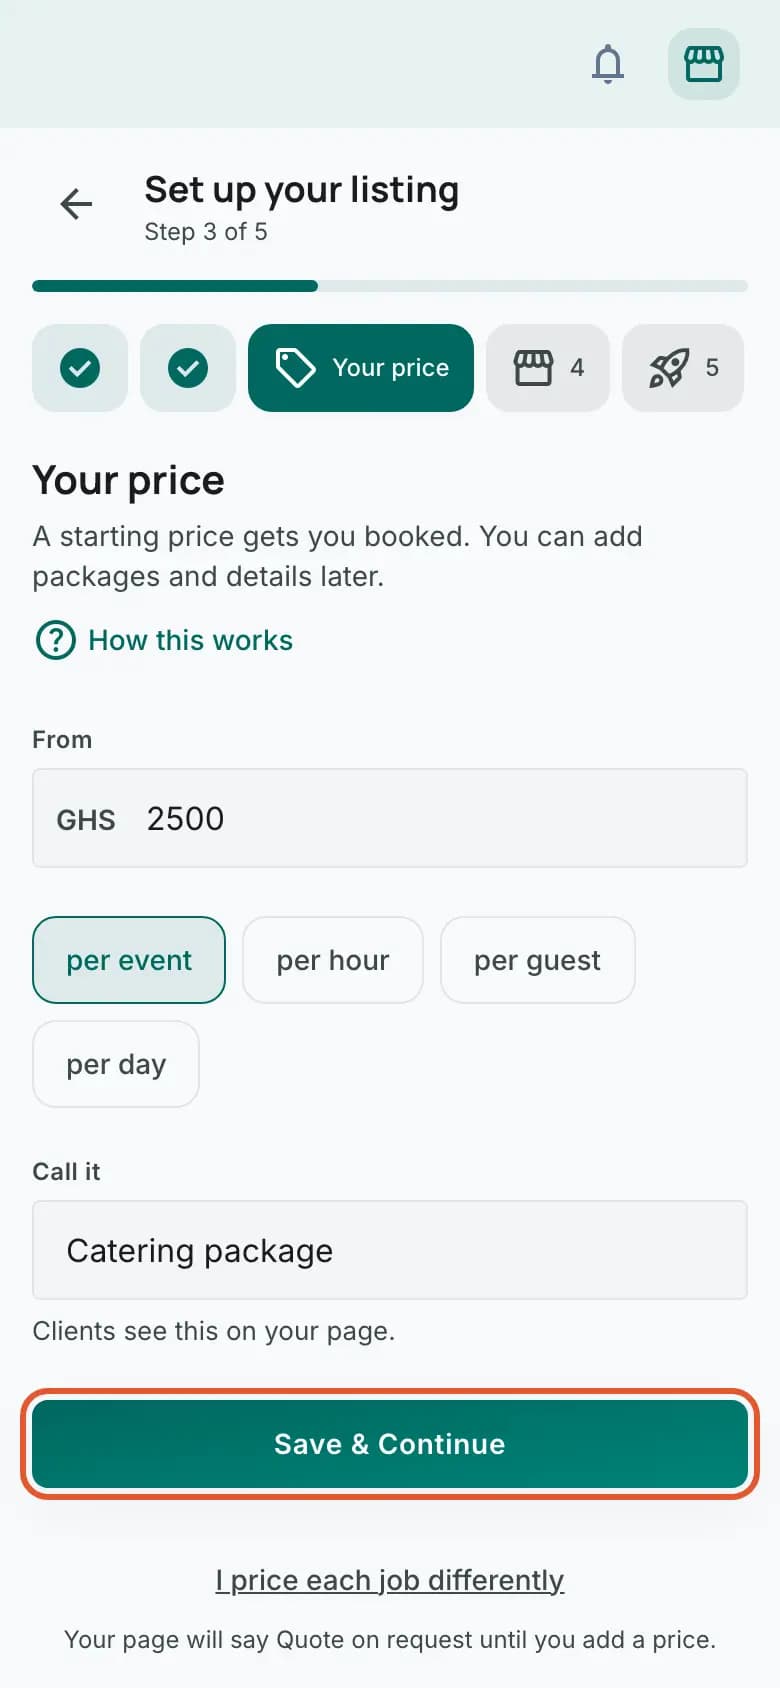
Add your logo
On “Your logo”, tap “Choose your logo” and pick your logo or a photo of your work. When “Logo added” shows, you are live: a green box says “You're live. Clients can find you in search. Identity verification is only needed to accept a booking.” Your logo shows beside your business name on your page.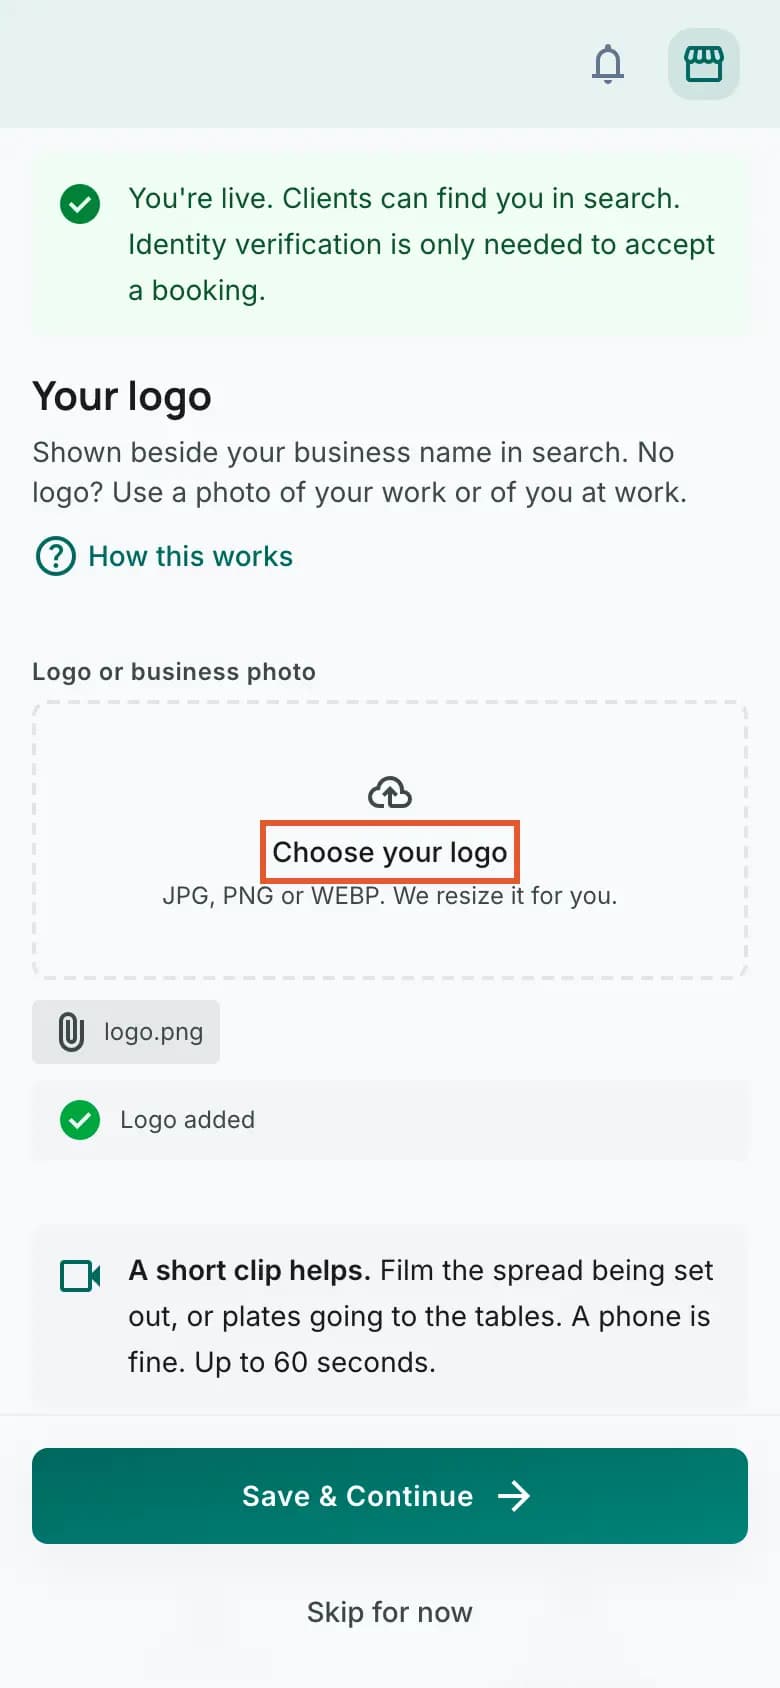
Add photos of your work
Still on the same screen, tap “Add photos” and pick a few photos of your best work. This is optional, but in search clients see your first work photo on your card, so it is worth doing. You can add up to 20 photos and clips. Then tap “Save & Continue”.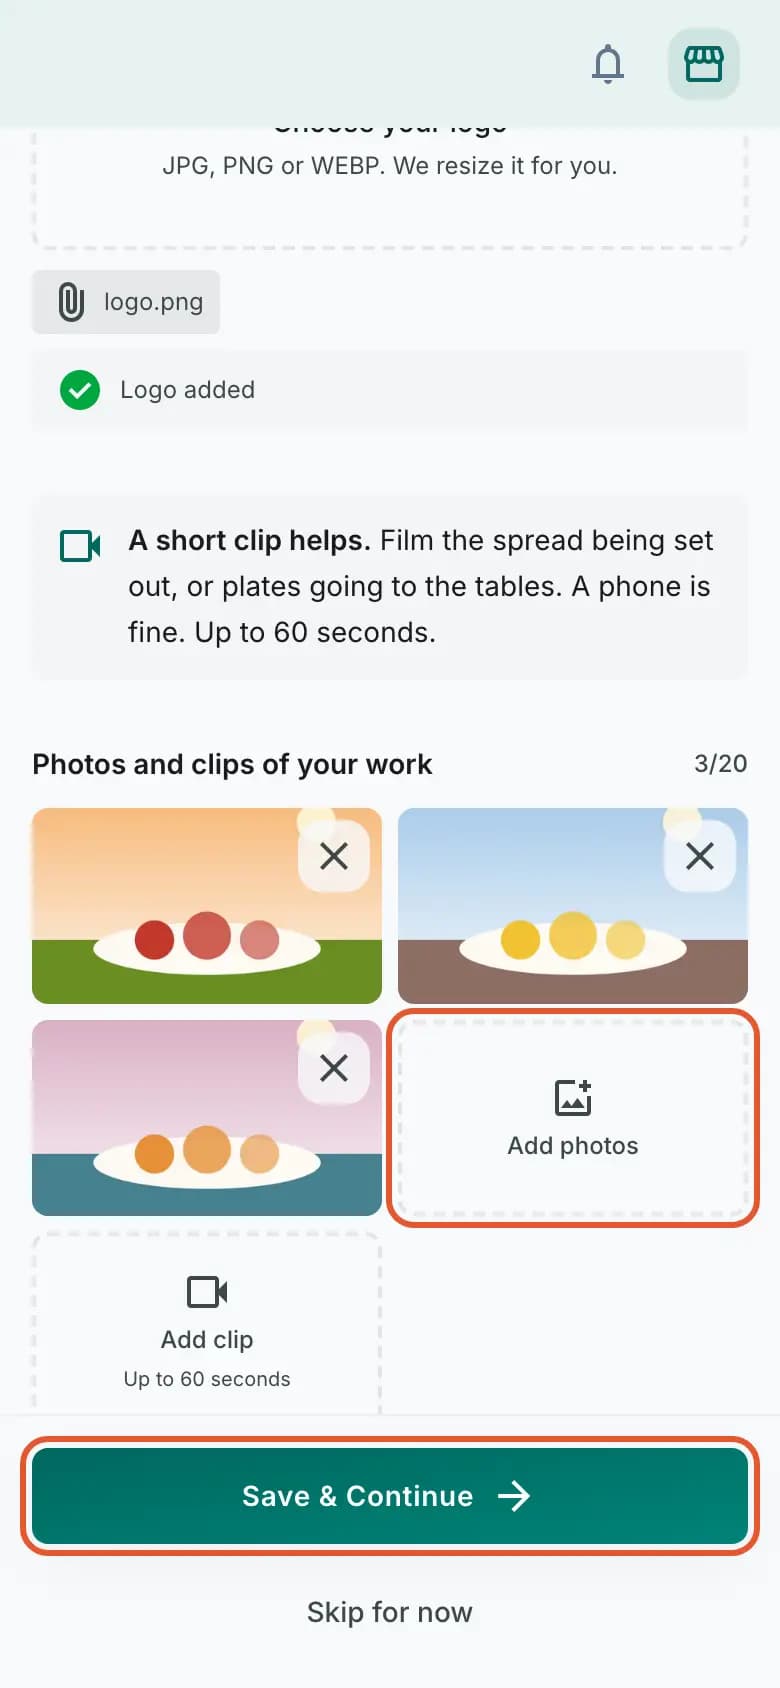
Check your card and share it
“You're live” shows your card the way clients see it in search. Tap “Share your listing” to send it to past clients, or “View your page” to see your public page. “Go to overview” opens your dashboard.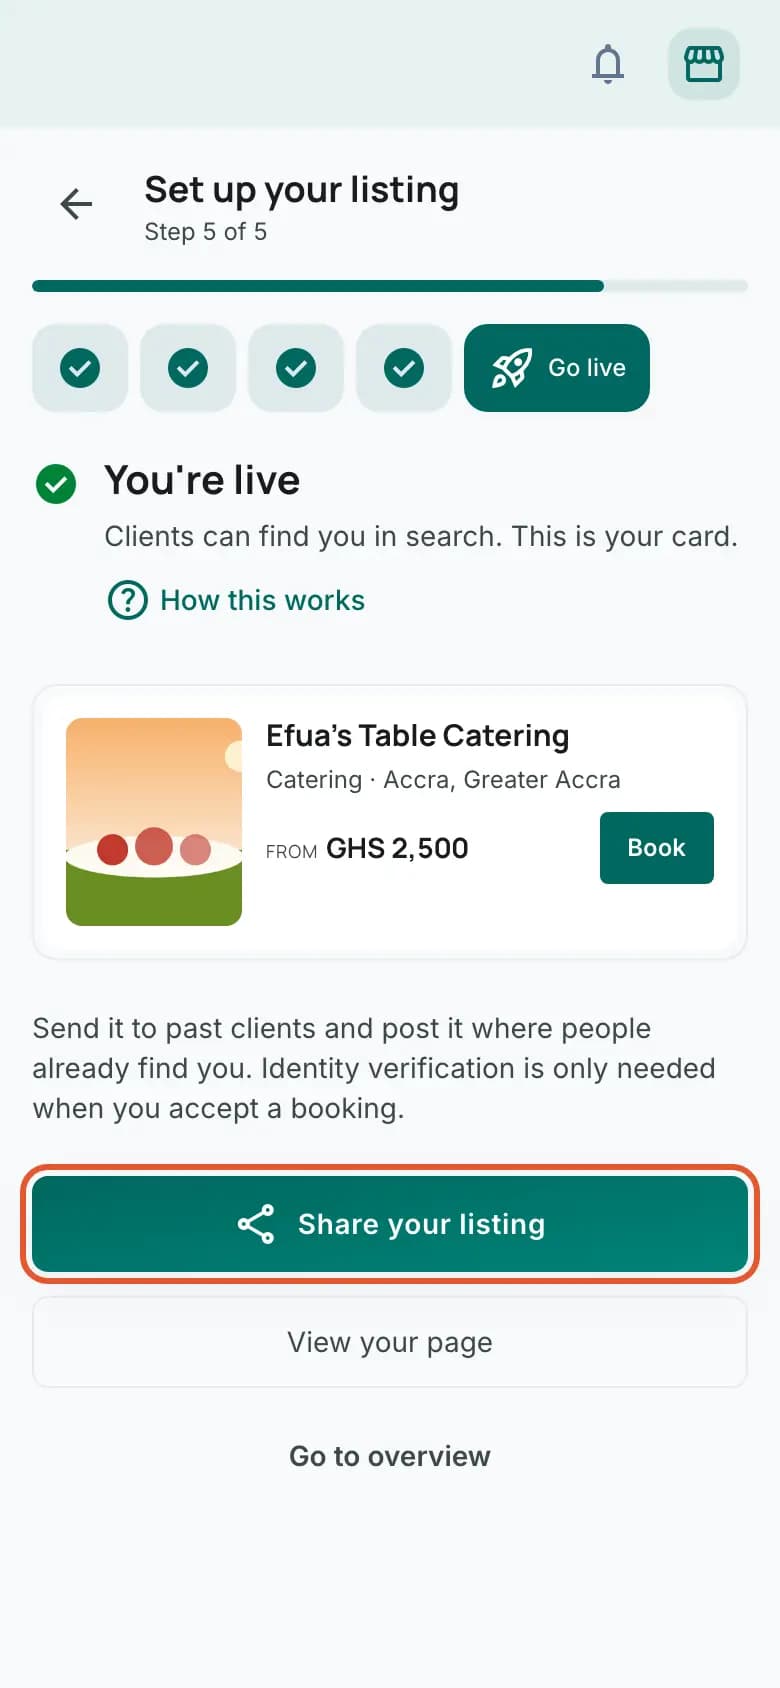
What happens next
Clients can now find you and send you quote requests. You do not need to verify your ID to be listed. You only verify your identity before you accept a booking: your overview shows “Verify your identity” under “Next up” when it is time.
Common problems
- “This email is registered as a client” when you create the account
- You already have a personal account with that email. Tap “Sign in to add your business”, sign in, and add your business to the account you have.
- “Write at least 100 characters so clients can find you in search”
- Your description is too short to appear in search. Add a sentence about the events you cover and the area you work in, then tap “Save & Continue” again.
- “Add your logo first. Clients see it beside your name in search.”
- You tapped “Save & Continue” on “Your logo” before adding one. Tap “Choose your logo” and pick a photo. If you have no logo, a photo of your work or of you at work is fine.
- You tapped “Skip for now” and you are not in search
- Skipping a step does not save it. Open Set up your listing again: the last step, “Go live”, lists what is still to do under “Still to do”. Tap each item to finish it.